
Let’s make 2 at a time half square triangles – the traditional staple quilt block! Here we are for part 2 of our journey through making half square triangles! This blog post is the second in my 4-part half square triangle series. Last week we covered some of the considerations when deciding which method to use when making these simple and versatile quilt blocks.
Also, did you catch my Ultimate Half Square Triangle Guide that includes measurements for all three methods? If not, check out the blog article here and print the guide for future reference!
So let’s get started with making 2 at-a-time half square triangles!
Get your quilting tools and fabric ready!
What you’ll need:
In addition to your fabric and your sewing machine of course, you’ll also need a few basic sewing supplies:
Quilting rulers in varying sizes
Thread (I prefer Aurifil 50wt in White for piecing blocks)
Iron/ironing board (I love my Oliso Mini Project iron and my wool pressing mat)
Mechanical pencil/fabric marking pen (I use Frixon brand pens)
Scissors or rotary cutter (Love my Olfa 45mm Pacific Blue rotary cutter or my Fairy Floss Pink one!)
Seam ripper (you just never know)
First, you will need to choose the final size that you need your half square triangles to measure. My Ultimate Half Square Triangle Guide will tell you what size your starting fabric squares should be. You’ll need 2 squares of this size.
I need 4″ half square triangles, so I am starting with two 5″ squares.

You will need a marking tool of some sort. I like to use Frixon pens because the ink disappears when exposed to the heat of your iron. Frankly, you could use any fabric marking pen or even a pencil. You will be sewing or cutting on this drawn line, so it won’t be seen in your final block.
I will show you 2 methods of marking your lines for your 2 at-a-time half square triangles.
With the first, we place one of our squares right side down on our cutting mat. I use a rotating mat because it’s easier to rotate the mat around to work with the fabric than it is to move the fabric!
Using your quilting ruler, place it corner to corner on the diagonal of the square and mark a line from corner to corner.
*TIP make sure you are accounting for the tip of your pen when you are placing your ruler. You want to make sure that you are lining it up perfectly so when you place your marking pen down and begin drawing, that your line is marked exactly corner to corner.


A different half square triangle marking tool
For the second marking method, I have to share a little secret tool with you. I know you are going to love it! This nifty quilting tool makes the sewing process a bit easier! Take a look at this little ruler!

The Omnigrid marking tool is 1/2″ wide and features a center line with 1/4″ on each side. This is one of my favorite specialty rulers and I really love it for marking half square triangles for one specific reason…sometimes sewing ON a line is easier than worrying about accurately sewing 1/4″ on the side of a line. While it requires a bit more effort because you will be drawing 2 lines, but it makes the sewing process quicker because you simply sew down the marked line.
If you are using this tool, place your fabric square right side down and lay the marking tool with the center line on the diagonal of your square.

Viola! Marked magic! Easy sewing lines! Told you that you would like this tool!

Sewing our half square triangles
Because we’ve marked our triangles in 2 different ways…we would sew them in 2 ways, depending on which tool you used to mark your squares!
I like to shorten my stitch length when sewing half square triangles. Now, back to those sewing lines…
If you marked one line on the diagonal of your square, then you will sew 1/4″ from each side of the marked line. If you used the Fons & Porter marking tool and marked 2 lines, they are your sewing lines. Sew directly on the marked lines.


After sewing, this is what each square would look like. Cute right?

Next we will cut our squares. With both methods, you will cut on the diagonal from corner to corner.
You can see that with each method, the marked lines are in different places on our HSTs but that’s OK because they will soon disappear!
Half Square Triangle Pressing Tools
These are not only my favorite half square triangle pressing tools, they are my ULTIMATE block pressing tools! Look for a blog article soon on ironing fabric and pressing blocks. I believe it is key in accurate patchwork!
I love my Oliso Pro mini-project iron! It gets super hot and the tip is perfectly pointed for pressing my seams and blocks.
I kept reading about a tailors clapper and how it made such a difference in helping your blocks lay flat. I bought a cheaper one online to try it out and was pretty happy with the results. But I really wondered about the quality and construction of what I bought.
Then I found something better…the tailors clapper from Modern American Vintage. The best tools are the ones that are efficient AND beautiful and this clapper is all that! They have various woods and what I love most is the various sizes! I need to buy more because when I get in a pressing frenzy, I just start laying clappers everywhere!
They have various sizes of tailors clappers and I prefer the longer ones. They are long enough to span a majority of the blocks that I make, so I can press and then lay it on the entire seam to flatten things out!
More on this in a future blog article, all about pressing & ironing!
Pressing and finishing HSTs
Now we have 2 ways to trim our half square triangles! This first method doesn’t require any special tool/rulers. You will press your block with the seam towards the darker fabric (or to one side or open if you don’t have a darker fabric).
I like to press (which means placing the iron down on the block, NOT moving side to side) and then lay my tailors clapper for a few seconds to flatten the block. The combination of properly prepping your fabric and this pressing method results in beautiful, precise and flat blocks!


Now for trimming. If you’ll remember, I mentioned that I want my half square triangles to measure 4″ when I’m done. Here is one of my Creative Grids rulers on top of the block. You can use any ruler that you like, BUT notice the diagonal line on the ruler? Find that on yours and line it up with the diagonal line on your block where your two fabrics meet. This is key!
I like to allow myself enough room to trim on all 4 sides of the block. In my opinion, it ensures that I have a nice, evenly trimmed block. Just say no to wonky blocks!
So let’s recap…line up the diagonal mark on your ruler with your half square triangle and trim two sides. Then rotate your block (or your rotating mat if you are using one) and trim the other 2 sides, again after lining up the diagonal line.

The second trimming method I want to share with you requires one of my favorite time-saving tools, the Clearly Perfect Slotted Trimmer. This is by far one of my favorite specialty rulers because it is so easy and saves time when trimming half square triangles (especially if you have a ton to make!)

Do not press your block open yet with this ruler. You will trim, then press! Take the nifty ruler and simply find the measurement you want for your trimmed block (in my case 4″) and line up the dotted line on the ruler with the sewing line on your block. Next, trim around the 2 edge. The brilliant part of this tool are the small notches on the bottom to trim the dog ears off at the same time! Win win!
After trimming, this is what you will have! Isn’t she a beauty? Now it’s time to press!


And there you have it! 2 methods for making 2 at-a-time half square triangles!

Ultimate Half Square Triangle Tools:
Baby Lock Sewing Machine (I sew on a Baby Lock Jazz II and a Ballad)
Thread-I use Aurifil 50 wt for all of my piecing
Mechanical pencil/fabric marking pen, i.e. Frixon Pens or Sewline Erasable Pens
Scissors or rotary cutter
Cutting mat – I like using a rotating cutting mat
Straight pins – I like ultra-fine Magic Pins or Clover extra-fine patchwork pins
Seam ripper
Oliso Mini-Project Iron
Wool pressing mat
Specialized trimmers (if you choose), my favorites are:
Clearly Perfect Slotted Trimmers
Bloc Loc HST rulers
Creative Grids 4 in 1 HST Ruler
Creative Grids Square 6.5″ quilting ruler
Affiliate Disclosure Policy: This website uses affiliate links, and I may earn a small commission if you purchase through these links. Please note that I’ve linked to these products purely because I recommend them and they are from companies I trust. There is no additional cost to you.
*This article is not sponsored by any of these makers/manufacturers, they are truly my favorite quilting tools and I want to recommend them to you! Do you have favorites that you swear by? Tell me all about them, I love to try new products out!

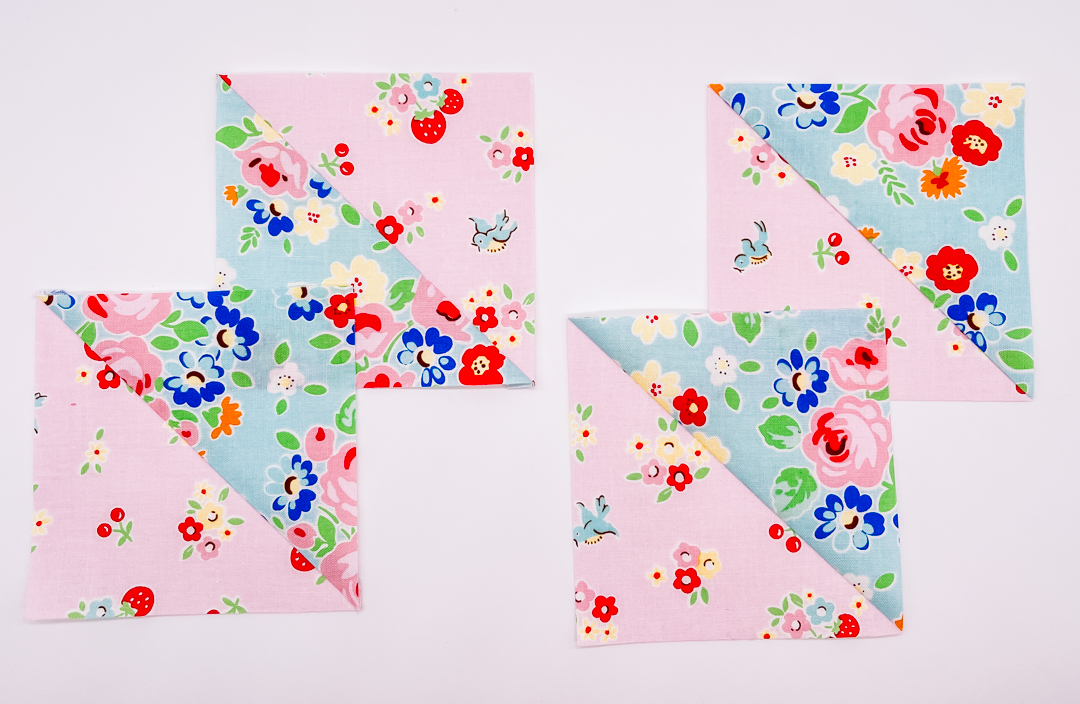


[…] Now trim on the opposite diagonal from corner to corner. Open them up and you have four beautiful half square triangles ready for trimming! Use your favorite method for trimming your blocks! I discuss this in more detail when I discussed the 2 at a time method. […]