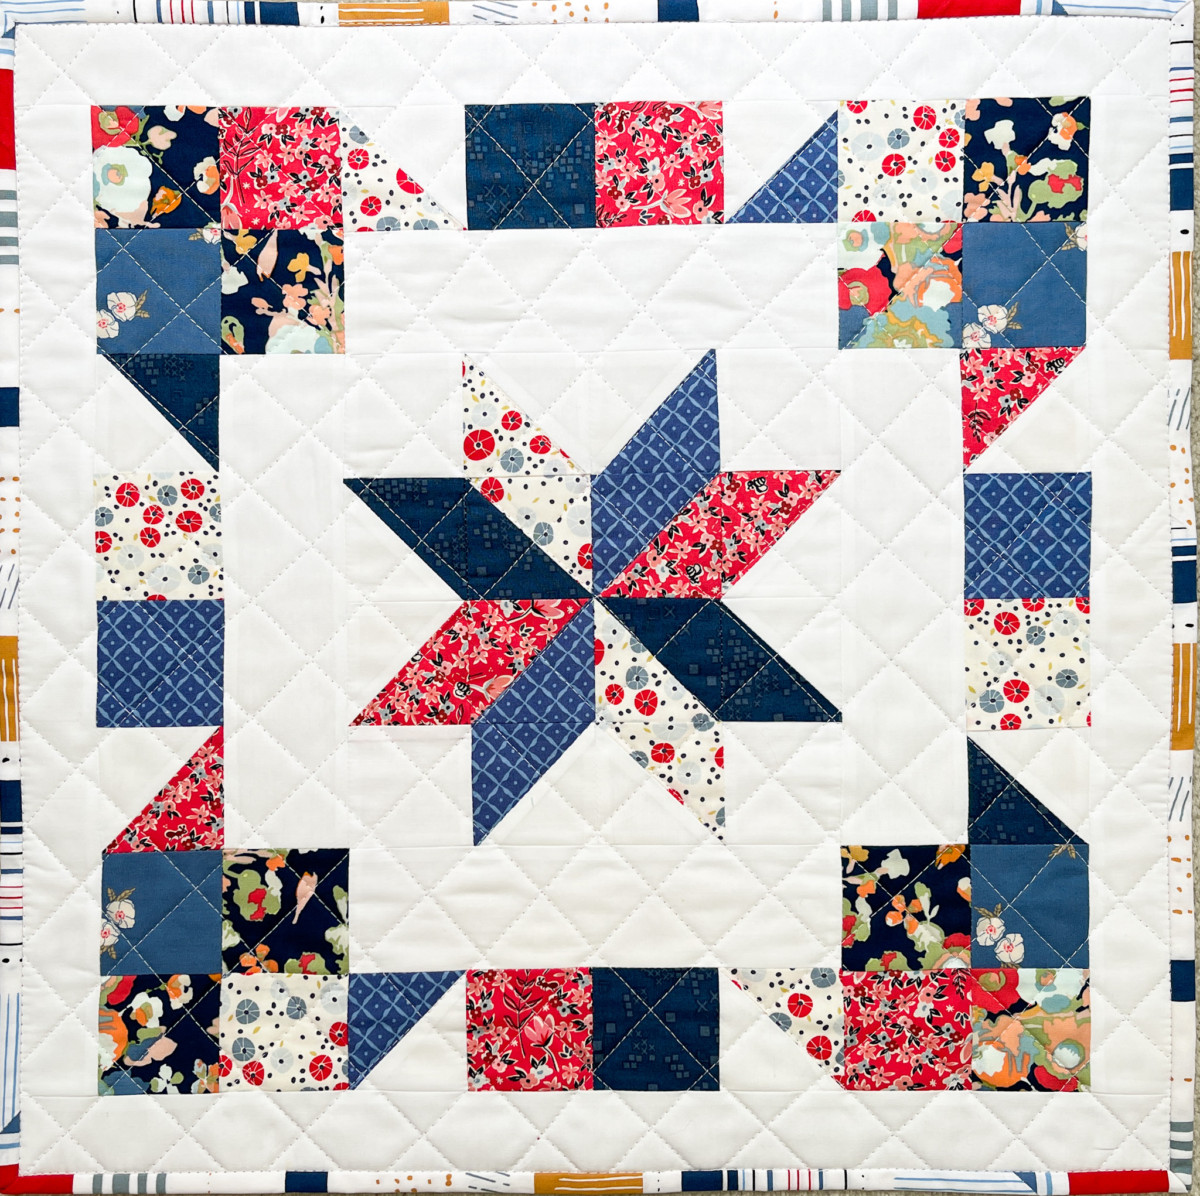
Elegante Virgule and I enjoy working together and collaborating with amazing fabric. She has opened my eyes to so many beautiful pieces! Recently, she showed me a striking quilt featuring many Rifle Paper Co. fabrics. She asked if I could create the quilt pattern for her. Of course, I said yes! Naturally, we both agreed because it was SO beautiful, we needed to share it with YOU as well!

The pattern is based on a simple technique of snowballing 2 corners of a fabric square. Many patterns use this technique, but in this case, the simplistic design of letting the fabrics be the showcase really makes the most impact. I shared more about making a simple snowball quilt block in a recent blog article and today, I’m sharing a bit more and the free pattern with you!
I will walk you through the pattern here, but if you’d like a printable copy, you can download it and print or save for future reference!
Let’s get started!
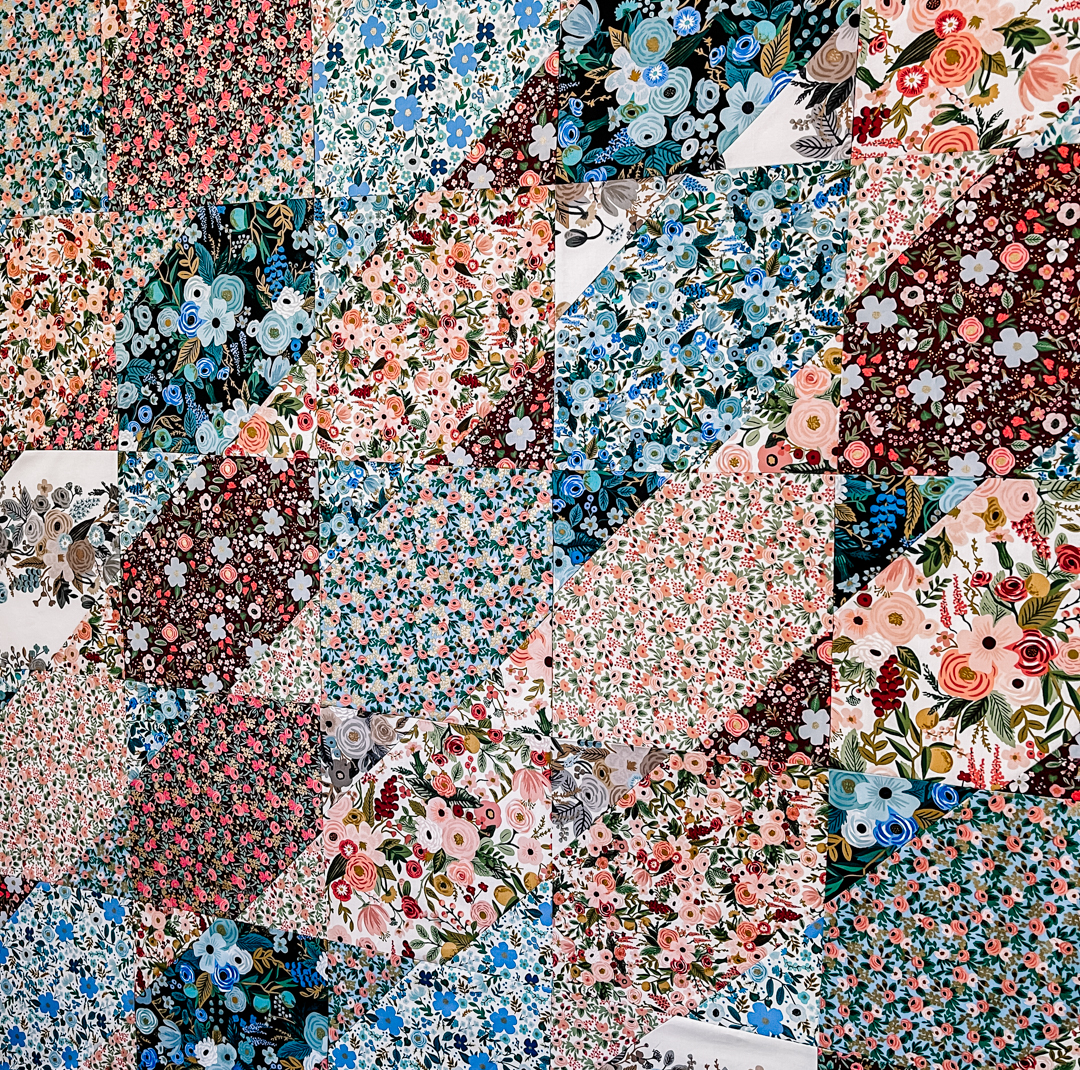
For this pattern, I used this beautiful Maple Cake Layer Cake featuring 40 various Rifle Paper Co. fabrics from their Garden Party Collection. Aren’t they amazing!?

This is what inspired Elegante Virgule and I to create this pattern! She has this beautiful layer cake in her store, and she also has these beautiful Rifle Paper Co. fabrics in yardage as well. The final quilt I made measured 48″ x 48″, but you can easily make additional blocks to increase the final size of your quilt!
Get your quilting tools and fabric ready!
What you’ll need:
In addition to your fabric and your sewing machine of course, you’ll also need a few basic sewing supplies:
- Quilting rulers in varying sizes
- Thread (I prefer Aurifil 50wt in White for piecing blocks)
- Iron/ironing board (I love my Oliso Mini Project iron and my wool pressing mat)
- Mechanical pencil/fabric marking pen (I use Frixon brand pens)
- Scissors or rotary cutter (Love my Olfa 45mm Pacific Blue rotary cutter or my Fairy Floss Pink one!)
- Rotary cutting mat
- Seam ripper (you just never know)
Quilting Fabrics
First, let’s talk about a layer cake. You may be asking, what IS a layer cake. Well, since I’m known for sweet names, you know this is right up my alley! Unfortunately, I’m not talking about actual cake. In the fabric world, a layer cake is a term for a package of 10″ squares of fabric in a variety of prints in a collection. The number of squares in the pack varies among manufacturers. This particular pack has 40 squares (4 of each print). Layer cakes can be a great idea if you want to use all prints within a particular fabric collection.

From the layer cake, choose (25) of the squares for the main blocks. Then choose an additional (13) squares to use for the corners. Cut these squares in half in both directions to create 5″ squares. You will have (52) 5″ squares. As we need (50) smaller squares to snowball our blocks, (2) of these will not be used, set aside for another project.

Also, you won’t be using the entire layer cake, but it gives you plenty of variety within the quilt, particularly since most prints are repeated in a layer cake.
Snowball Quilt Block
With this pattern, I wanted the “snowballed” corners to be a bit larger so that the fabrics could really stand out. Which is why I used 5″ squares on 2 opposite sides of my main square. You could use smaller or larger squares to create a different look.
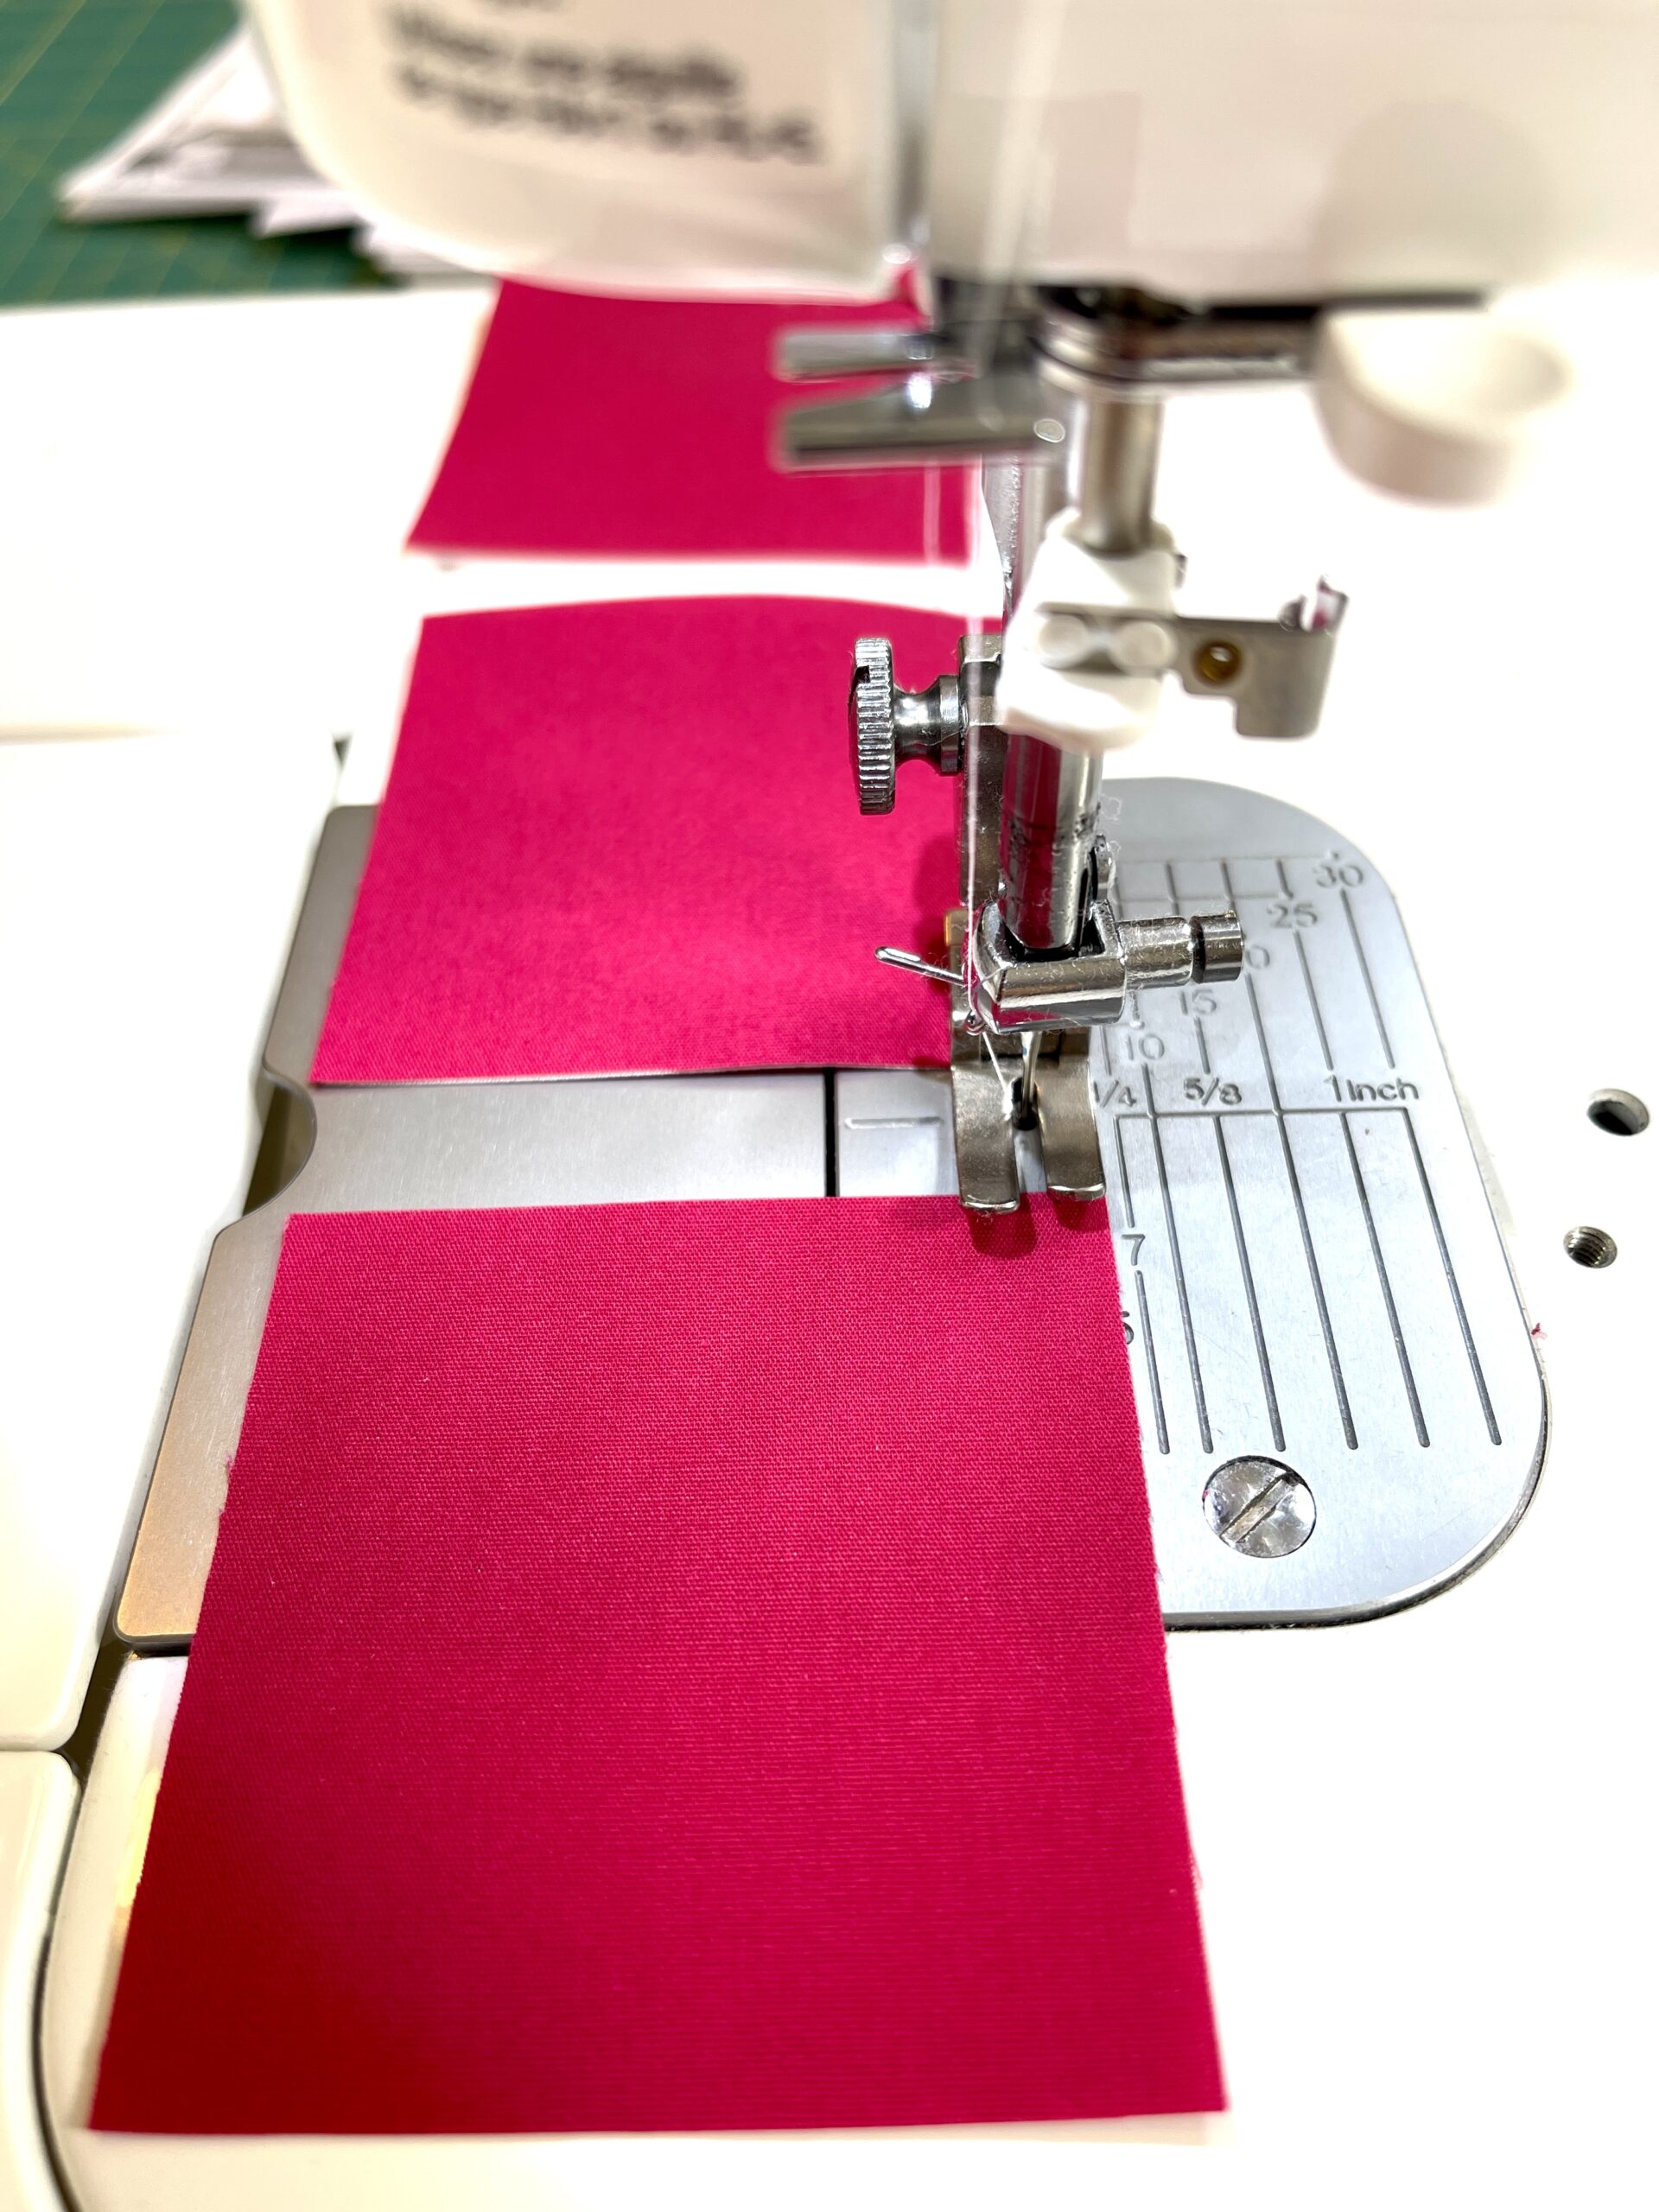
Take your smaller squares and either draw a diagonal line on the wrong side of the fabric from corner to corner or lightly press the square in half to crease it. This snowball quilt block tutorial shows you more about this technique.
Place one 5″ square on the corner of your 10″ square right sides together and another 5″ square right sides together on the opposite corner of the 10″ square. Pin in place. I am not a fan of a lot of pinning, but I like to pin these far enough away on either side of the drawn lines. This makes chain piecing these blocks a breeze! So quick!

Sew on or just slightly outside of the drawn (or creased) line. REMINDER: We are NOT sewing ¼” away from the line as you would in some cases, like when making half-square triangles. We are sewing ON the line. Repeat with the remaining squares.


Finishing your blocks
Trim ¼” outside of your sewn line. You will be cutting off the corners of the sewn square. Your cut piece will look like this.
Don’t throw away these trimmed pieces! They will make easy half square triangles that you can use in another project!

Look at these beautiful trimmings!
Press to set your seams and then press squares toward the outside of the corners.

The block should measure slightly less than the original 10″. The final size will depend on where your sewing line ended after pressing the squares open. Simply measure the final pressed blocks, trim as needed to ensure all of your blocks are uniform in size. The final size should be between 9 1/2″ and 10″. As long as the block sizes are all consistent, it’s fine! Remember, there are no quilt police!
Layout the blocks as you would like! Sew each block RST with 1/4” seam. Continue sewing each row to the next until your quilt top is complete!
What do you think? Isn’t it wonderful how this pattern comes together so quickly and really allows the fabrics to be the showcase? What do you think?
Drop me a comment and let me know! And then head over to Elegante Virgule’s shop and get your Rifle Paper Co. fabrics to make your own quilt!
Tag me on social media @sugarstitchesquiltco and use the hashtag #berrycheesecakequilt when you do so I can see your beautiful work!

My ESSENTIAL tools used with this pattern!
Baby Lock Sewing Machine (I sew on a Baby Lock Jazz II and a Ballad)
Thread-I use Aurifil 50 wt for all of my piecing
Mechanical pencil/fabric marking pen, i.e. Frixon Pens or Sewline Erasable Pens
Scissors or rotary cutter
Cutting mat – I like using a rotating cutting mat
Straight pins – I like ultra-fine Magic Pins or Clover extra-fine patchwork pins
Seam ripper
Creative Grids 6.5″ Quilting Ruler
Creative Grids Perfect 5” Ruler
Affiliate Disclosure Policy: This website uses affiliate links, and I may earn a small commission if you purchase through these links. Please note that I’ve linked to these products purely because I recommend them and they are from companies I trust. There is no additional cost to you.