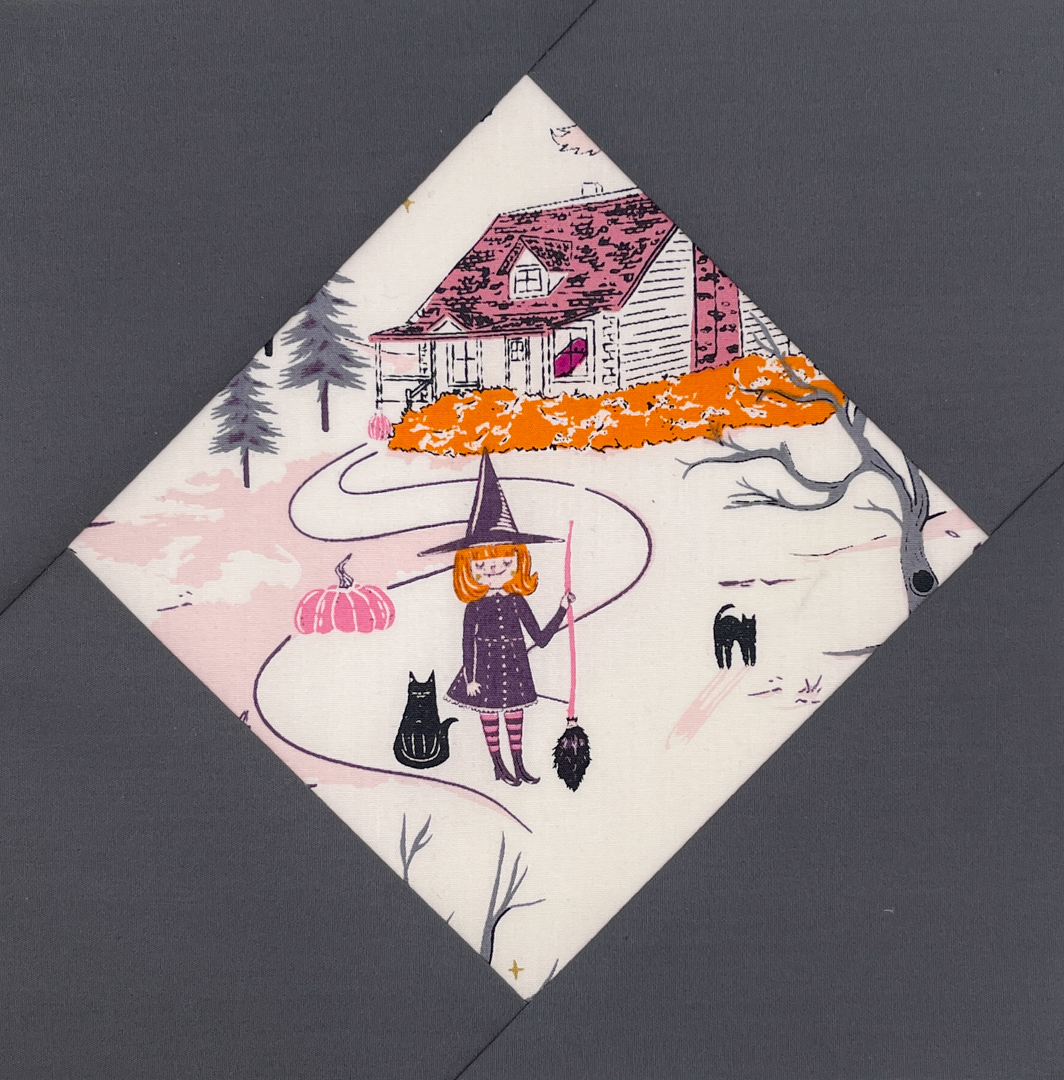
The diamond-in-a-square block is such a fun block to make! It allows you to highlight a fabric pattern or fussy cut the most perfect details! This block one makes up one of the center blocks in my Churn Butter Cookie quilt pattern and I am just in love! I have received so many questions about the pattern and the various center blocks. So my goal is to answer those questions on the blog along with tutorials…so everyone can learn and benefit from the tips that I provide!
How to make a diamond in a square quilt block plus tips on how to get PERFECT points every time!

One of the most common questions I have received is…what IS a diamond in a square block and is it the same as a square-in-a-square. If you are wondering what the difference is, I have an easy answer for you. The diamond is a square turned on point! Easy peasy! There are no additional steps or skills required to make the change!
Another common question has been, what is the difference between a square/diamond-in-a-square and an economy block. Also an easy answer! The economy quilt block will typically have a second set of triangles framing the center block, so essentially this is one less step than that block. Make sense? If not, leave me a comment and let me know!
Now let’s get to work!
Fabric cutting
As I mentioned, this is one of the blocks in my Churn Butter Cookie quilt pattern. I made a Halloween version that may be my new favorite quilt! In that quilt and this tutorial, I used Art Gallery Fabrics Spooky & Sweeter Collection. It is such an adorable fabric collection and perfect for fussy cutting! I am also using Art Gallery Fabrics Pure Solids in Moonstone.
In this tutorial, I am making my center block a bit bigger than it is in the Churn Butter Cookie pattern.
I wanted my center diamond-in-a-square block to be 4.5″ FINISHED, so I cut:
(1) 5″ square for the center*
(2) 4.75″ squares, then subcut diagonally to make 4 triangles for the frame
I used my Creative Grids ruler to fussy cut my block, but I also have an amazing set of Fons & Porter Fussy Cutting Rulers that give you a clear view to cut your fabric.

NOTE: If you are using directional prints, make sure that you consider this when cutting your fabric. We are making a diamond from the square block, so make sure your prints are aligned correctly!
Do not fussy cut your block like this unless you want a square-in-a-square block! 👇

Place your ruler on point, like this!! 👇This will give us a perfect fussy cut diamond-in-a-square block!

Block construction
First step is to sew a triangle to 2 opposite sides of the center square. You will need to match the center of the square with the center of the triangles before sewing. You can achieve this in a variety of ways. The most common method is to fold the center square and the long side of the triangles in half and finger press. Match the centers of each and pin. Your triangles will be slightly longer than your square. I like using Clover fine quilting pins, they are thinner than other brands of pins, they go into the fabric easier and I find that they don’t cause shifting in the fabrics after I’ve lined them up.
Fold the square in half and finger press the center point

Fold the triangle in half and finger press, match up with the center of your square and pin in place!

2 perfectly aligned triangles ready to sew!

Sew the two sides using a ¼” seam. Press to set your seams and then press the triangles away from the square. Trim the dog ears to reduce bulk.

Take the (2) remaining triangles and repeat the process to sew to the remaining two sides. Press away from the square.

Viola! Finished and ready for trimming!

Trimming your block
Trim your block as needed. VERY IMPORTANT: Make sure you are trimming an equal amount around the entire block to keep it uniform and make sure to the keep at least a ¼” seam outside the center square for your seam allowance so that you do not lose your points when you sew the block with your next pieces.
Perfect points!
Let’s talk a bit more about how you will use your block and a secret to keeping perfect points. Let’s take a look at the back of our block. Notice the area where your seams have crossed. When you are sewing your diamond-in-a-square block to the remaining pieces in your quilt, you will want to pay very close attention to THIS spot…

Make sure that your sewing line is ever so slightly on the outside of the intersection of the seams. If you sew on the inside of this intersection of seams, you will lose your points! Take your time and focus on this spot as you are sewing!

And here we are, the final product! Press your seams open and reveal that beautiful point!

Here is my final block!

These blocks look beautiful in my Churn Butter Cookie Quilt pattern! Here is the full quilt in these adorable Art Gallery Fabrics!

Affiliate Disclosure Policy: This website uses affiliate links, and I may earn a small commission if you purchase through these links. Please note that I’ve linked to these products purely because I recommend them and they are from companies I trust. There is no additional cost to you.
*This article is not sponsored by any of these makers/manufacturers, they are truly my favorite quilting tools and I want to recommend them to you! Do you have favorites that you swear by? Tell me all about them, I love to try new products out!


